Thursday, December 27, 2012

Christmas Center-Piece

Hello Everyone!
I hope you all had a fabulous Christmas!

This is a center-piece that I created using my Dresden Plate ruler, and gave it to my Mom for her Birthday, which just so happens to fall on Christmas Eve.


I previously did a tutorial on making a Thanksgiving wall hanging and I used the Dresden Plate ruler to create the feathers of the turkey.

I just wanted to find more uses for my Dresden Plate ruler, other than of course making Dresden Plate quilt blocks.

I used 8" blades to create a circle, then I hand appliqued the circle in the center, quilted and then bound it. Note you must use bias-binding to bind curves or circles, you can't use straight pieces, or they will not bend into shape properly.

Our kitchen table and some of our end tables are round, so I like making circular things to use as mats or center-pieces to decorate with, rather than square table cloths.

This is definitely a great way to use up Christmas scraps, and can even be adapted to make a miniature tree skirt.

Happy Quilting! :)

Thursday, December 20, 2012

Mod-Podge Fabric Plates

Hello Everyone!
I am officially done my exams for this semester, so as promised here is a super quick idea for those of you looking for a last minute Christmas project/hostess gift!

This is a tutorial on how to decoupage fabric onto the back of a glass plate. I did this little craft with some of the students in my sewing classes, as gifts for Mom, Grandma and Aunties. It's really fun and easy to do, you can whip up several in just one afternoon!

Here is a picture of the finished plate:

You will need:
-a clear glass plate
-a cotton fabric of your choice, it should be a couple inches bigger than your plate (I used a 10" plate) Note, that when choosing your fabrics it is best to sit your plate on top of various fabrics, so you will be able to imagine what each print will look like. You do not want to use a large print, or you won't get a lot of the print in your plate.
-Mod Podge
-a foam brush to apply the Mod Podge to your plate


First make sure you rinse your plate and dry it well, to make sure there are no finger prints or dirt on the glass. Then coat the BACK of the plate with a generous amount of Mod Podge, make sure you come right up to the edge of the plate too!

Then take your ironed piece of fabric and put that pretty side face DOWN on the back of your plate and smooth it out with your hands, making sure there are no bubbles. (At this point you should feel the glue start to come through the fabric, that is a good thing). Go along the edge of the plate and press the fabric down against the glue, you want to make sure the edges do not lift.

After letting it sit for about 3 minutes, trim the excess fabric so that your fabric is as close and as even with the edges of your plate as possible.


Now, you're going to completely cover it in Mod Podge again, use a generous amount but make sure it is an even layer and that you go over your edges again.


You have to now let your plate dry over night. I recommend that you repeat this last step, so that there is two layers of Mod Podge against the back of your fabric.

Now you're finished and ready to make as many as you wish! (Note that you can not put this fabric plate in water or the dishwasher, as the glue will not hold, and the fabric will come away from the plate. To clean, just wipe the top of the plate with a wet cloth.)

You can definitely play using various holiday prints or even everyday fabrics, depending on the occasion.

This is my personal Mod Podge assistant, he likes to watch :)


If you would like a fun Christmas cookie recipe, so that you can load up your plate with goodies, you can follow this link:  http://feelingcrafty.org/peanut-butter-reindeer-cookies/
I made those cookies just a couple weeks ago and they are AWESOME! 


If anyone tries this, I'd love to see it, you can send me an E-mail at quilters.workshop@gmail.com or post a photo to my Quilter's Workshop facebook page!


Friday, December 14, 2012

Christmas Quilt Contest

Hi Everyone!

Sorry for my lack of creative blog postings, I've been really tied up with studying for my final exams! But I'm almost there, just three exams left and it will all be over on the 18th.....so you can most definitely expect some fun Christmas related posts right after that!

I have a HUGE favor to ask all of you! I recently submitted one of my Christmas wall hangings (Dash Away) into a fun online voting contest hosted on The Quilting Gallery. The Quilting Gallery is an awesome website and I have been featured on her blog-guest page before.

This is the quilt that I submitted: It's called Dash Away and is completely machine appliqued or hand embroidered. I previously made an entire blog post about this quilt (scroll down a bit and you will find it!)
This is definitely one of my favourite quilts in my entire collection, I've brought it to every trunk show I've ever been to and everyone always loves it! So if you love it as much as I do, I'd be so very thrilled if you were to vote for my quilt this weekend! Voting is open between Friday December 14th and Monday December 17th (but closes at 8am on this day).

Check out the link below, follow the instructions on the top of the page and view the 55 submissions! :)

http://quiltinggallery.com/2012/12/14/vote-now-christmas-quilts-2012/

Thank you!

Thursday, December 6, 2012

Fabric Origami Christmas Ornament


This was the very first time I have ever made a fabric origami Christmas ornament, but it turned out really well and I'm sure to make more of these...as soon as I have some spare time off school!

 I used 2 Christmas prints and the red coordinating solid, as well as a wide gold ribbon for the middle, with gold rick-rack centered on top of the ribbon, and then I used a slim red and gold ribbon to tie a bow and make the hanging loop.

As time consuming as this was to make, as soon as I make more I will post more pictures and hopefully will have a video tutorial of this done soon! 


Monday, November 26, 2012

Christmas Gift Ideas

Today I wanted to share with you some quick, easy and economical Christmas gifts that you can make at home perhaps using some fabrics that you might already have in  your stash!

I've recently added two new Youtube videos to my channel that will discuss:

1. Christmas gift ideas using leftover holiday-themed materials
http://www.youtube.com/watch?v=mejfk82AOtw&feature=plcp

2. Christmas gift ideas using recycled denim
http://www.youtube.com/watch?v=2SqnNX7qdCE&feature=plcp

Hope these videos help or inspire some gift ideas!

Happy Sewing! :)

Wednesday, November 21, 2012

Christmas Quilts, Post 5

This Christmas quilt is probably my absolute #1 favourite.

It measures approximately 59x38.

The entire thing is machine appliqueed or hand embroidered. It is from a pattern called "Dash Away" by Bee Creative Studio. (www.beecreativestudio.com)


This year, my parents have hung my jumbo Christmas stockings on either side (I made them using panels several years ago). From the ceiling, they have hung jumbo Christmas ornaments using clear sewing thread, so that the ornaments looks like they're floating just above the garland/quilt.

This quilt is usually a crowd favourite at trunk shows, so it comes with me every time I do a presentation.


This is me talking about the quilt at the Lindsay Creative Quilter's guild. 

One of my students actually completed this quilt in my classes last winter: (this is proof that YOU can make it too!)


Never be discouraged by a pattern, YOU CAN DO IT!


Tuesday, November 20, 2012

Christmas Quilts, Post 4

Today's wall hanging is really simple!

I took a paper piecing foundation block of a snowman's head from my Electric Quilt program.
I then enlarged the paper piecing block to my desired size, and instead of printing out the foundation pattern, I selected the option to print out the templates/cutting directions.


Paper piecing small blocks is done for the purpose of being able to piece together a block that has really tiny pieces, that you would not be able to put together otherwise. However, it is actually quite difficult to cheat and use a paper piecing pattern for pieces that are too large. If they are large enough to piece together normally, then that is what you do! It is important to utilize the proper techniques for specific projects.

His eyes and nose are machine appliqued, and his mouth is hand embroidered. I added an actual scarf at the end, to add more detailing.

This is a quick idea that can be done for any block you chose from Electric Quilt. (or any other foundation piecing pattern)


Monday, November 19, 2012

Christmas Quilts, Post 3

This quilt is called Will&Chill and was featured in a McCall's Quilting magazine a few years ago.

It is definitely one of my favourites and goes together quite easily.


The kit and pattern is available online at http://www.mccallsquilting.com/mccallsquilting/articles/Will___Chill

Sunday, November 18, 2012

Christmas Quilts, Post 2

My second Christmas wall hanging that I have to show you today is one of my own designs. I used a Christmas panel with a snowman on it, and added a pin-wheel border, using red and cream 10" squares. After that, I added a log cabin border using various shades of green. I think the log cabin border looks like the spirals on a candy cane.

This quilt is queen sized, but I'm fortunate enough to have a large wall in my hallway, that is tall and wide enough to hang big quilts on. (I'm also fortunate to have a Daddy willing to make quilt racks all over the house!)

I thought this would be a nice inspiration of what to do with simple Christmas panels.


Friday, November 16, 2012

Christmas Quilts

Hello everyone!

My Mom has jumped right into the Christmas spirit and has begun hanging my quilts and slowly decorating the house in small stages. It looks really great so far and since I have such an abundance of Christmas related quilts and hangings in my collection, I thought that I would feature one daily. (However you can view all of the photos in my album Christmas Inspiration 2012, on my Quilter's Workshop Facebook page!)

Today I will be featuring my "Classic Santa" wall hanging (as I like to call it).
I love the look of this traditional wall hanging because Santa has a structure similar to a Nutcracker doll, and I absolutely LOVE Nutcrackers!

He is approximately 25 x 49 inches.

I used buttons for his "bell" on his hat, his eyes, and of course down the front of his coat.


I think he would look great as a door banner or as a wall hanging, you could even dress it up and hang some garland across the top of the quilt. 

Below is a link to the free pattern, designed by Debbie Mumm!


If anyone creates this wall hanging I would absolutely love to see it! You could E-mail me a picture at quilters.workshop@gmail.com or post a picture to my Quilter's Workshop Facebook page!

Happy Christmas Crafting! 

Thursday, November 8, 2012

Upcoming Craft Show

Only one week until my next holiday craft show!

Please join us, at the annual Eastdale Collegiate & Voactional Institute Craft Show

Held: Saturday November 17th and Sunday November 18th 2012 at 265 Harmony Rd. N, Oshawa

Hope to see you there!

Thursday, October 18, 2012

Durham Craft & Gift Show

Hello Everyone!

I wanted to make a post to let everyone know that I will be a vendor at this weekend's Durham Craft and Gift show. My business, Quilter's Workshop, will be operating in booth 12A.

The show times are as follows:
 Friday October 19th : 3PM-9PM
 Saturday October 20th : 10AM-5PM
Sunday October 21st : 10AM-4PM

The show will be held at the Durham College/UOIT rec centre, 2000 Simcoe St. N, Oshawa.

General Admission is $6
Senior Admission is $5
And children are free!

See the link below to print your $1 off admission coupon!

http://www.showsdurhamregion.com/event_view.php?id=225

There will be over 100 vendors!

Hoping for a great weekend and a great turn out!


Wednesday, October 3, 2012

Thanksgiving 2012

First of all, I can not believe how quickly Thanksgiving has approached us! Just a few days away now!

I have the perfect Thanksgiving wall hanging to show you!


I have so many Christmas and Halloween themed wall hangings and realized I needed something strictly fall or just for Thanksgiving! I came across the idea for this design from a Youtube video by the Missouri Star Quilt Company, however their design is slightly different.

As some of you may have already noticed, I made his feathers using a "dresden plate" design. To make cutting the blades of your dresden plates easier, I highly recommend this ruler:


Here is a picture of a traditional dresden plate quilt block, in case anyone has not seen one before:


For the feathers of my turkey, I used the 7" length to create my blades. (This ruler comes with instructions on how to use it) I used 15 blades of scraps of deep reds, golds and oranges. You can choose whatever colours you would like, you could even choose to make them all the same colour, possibilities here are endless!

You can cut your background piece whatever size you would like, depending on how much space you want to be left around the edges of your turkey's feathers. I believe I cut mine approximately 15x18

Once your feathers are joined together (using the same dresden plate applique technique) you hand stitch them onto your background material. For the body of the turkey, I used a circle (just like the middle of a traditional dresden plate block, I used a bowl as a template) For his head/neck I drew an hour-glass shape (your drawings don't have to be too accurate, just have some fun with it!) Again, for the feet I drew them, free-hand on a piece of paper and when I had a template I was happy with, I then cut them out of fabric. (Dad's are also very good at assisting with sketching turkey feet....hehe thank you Daddy!) 

I machine appliqued the body, head and feet, I only hand appliqued the feathers. 

I then added his Thanksgiving tie by using one of my leftover dresden plate blades, folding the raw edges in and hand stitching it on. 

Next I added an inner border (cut 1") and an outer border (cut 2")

I quilted it on the machine and bound the edges by hand, and also added a sleeve on the back in order to hang it. I also did a decorative stitch, to enhance the look of the red outer border, using a light beige thread.

For the eyes, I hot-glued some googly-eyes that I found at the dollar store, to give him a more comical and animated look (I was originally planning on hand embroidering the eyes, but I liked the idea of the googly-eyes better). 

Here is a close-up photo so you can see the detailing a bit better!


Wishing everyone a wonderful Thanksgiving! 


Friday, September 14, 2012

FALL

Hello Everyone!

I hope you all had a nice relaxing summer and are enjoying September so far!
I am so very happy to be back to school and back into teaching my fall & winter sewing classes!

So far my classes have been very productive and I even have some photos of completed projects to share with you!


If you are interested in classes you can send me an E-mail at quilters.workshop@gmail.com for more information!

Monday, August 20, 2012

The Canadian Quilter

Today, I received the Autumn 2012 issue of The Canadian Quilter Magazine.
This is the 2nd magazine I have ben featured in, in less than a year!
The article is based on an interview I had with one of the writers for the magazine and also includes some pictures of my work, on page 93!

I am so very honoured and excited to be featured in their prestigious magazine. Thank you CQA!

Cover of the issue:
My article on page 93:


Friday, August 10, 2012

Hand Stitched Fabric Flowers

I've recently made some flowers out of scraps of fabric and odd buttons, that are very quick to do and do NOT require the use of a "Clover yo-yo Disc".

With the help of a special friend, I now have a YouTube tutorial explaining how I made the flowers.
http://www.youtube.com/watch?v=QVGJSFtDr6A


After the creation of the video, I decided that the flowers could also be turned into hair-flowers.

I purchased a package of hair clips at the dollar store, that look like this:


Since the clips had tiny holes in them, I was able to sew the clip directly to the back of one of the flowers that I made.


You can make these flowers out of any type of fabric and use them as embellishment for many sewing projects or other types of crafts.


Thursday, July 19, 2012

Summer Camps

I thought I would share a few photos of some of the work my students have done so far in their summer camps!


The following photos are summer dresses made with a shirred bust, I have previously posted a tutorial on how to accomplish that look.


Lots of awesome work so far this month by my young students!


There are two articles about the PEC Quilt Show that I was the guest speaker for, published in local newspapers!

The Picton Gazette
http://issuu.com/pictongazette/docs/picton_gazette_july12

The Wellington Times
http://wellingtontimes.ca/a-stitch-in-time/

both really great articles, their guild hosted a fabulous show that I`m sure will be the talk of the town for weeks to come!


This is Lacey, my Aunt`s dog. She is going to be my new sewing buddy! 


Saturday, July 14, 2012

Basket Weave Quilting

While recently the guest artist at the PEC Quilt Show, in Wellington ON, I had the opportunity to sit in on a demonstration presented by the President of their guild.
She demonstrated a technique called the Basket Weave, I`ve recently taken the technique and used it to create a small table mat.

The greater number of squares that you use, the more you will notice the basket weave design. It is recommended that your squares all be of the same print, or at least all shades within an identical colour or pattern.


I cut my main fabric into 5 inch strips, and my dark brown sashing I cut into 1 inch strips.
I sewed a sashing strip onto either side of my 5 inch strip, after they are sewn on, press the seams towards your darkest fabric.

Measure the new width of your strip, mine was 5 & 6/8"
Use this new size, to cut as many squares as possible from your strip of fabric.

To make my table mat I used 8 squares.

Lay your squares out, so that your sashing directions alternate, which forms the basket weave design.

Once your centre is sewn together, I added a 2 inch border of a coordinating colour.

Now you can quilt, back and bind your mat as desired.


*TIP: This technique would work really well in flannels to make a baby quilt.


Monday, July 9, 2012

After A Quilt Show

This past weekend I was featured as the guest artist for the Prince Edward County Quilter`s Guild 2012 Quilt Show, held at the Essroc Arena in Wellington ON.


It was a fantastic show with approximately 800 guests per day!
I re-connected with some familiar quilters and spent lots of time speaking about my work to the various people viewing the exhibits.

While at the show I purchased a `Scallops, Vines and Waves`ruler by Quilt in a Day. I can`t wait to try it out!

I also observed a new basket-weave quilt technique, I`ll post pictures when I put that technique to use.

After a quilt show, whether I am a featured artist, demonstrator or even just a viewer amongst hundreds of others, I always leave a quilt show on what I like to call a quilting-high.
I think it is caused by spending a long period of time, basking in the works of other quilters, and speaking to people who share in my passion for quilting and other forms of fiber-arts. The amount of inspiration and support you receive from participating or attending a quilt show is phenomenal.

I recommend travelling to different towns to attend shows hosted by various guilds. You will be so surprised at how different each one is. The more quilt shows you attend, the more diverse amount of quilting knowledge you will obtain, by watching and learning different tips and techniques.

The Canadian Quilter`s Association has a calendar of events on their website, I encourage you to check it out and attend an upcoming event!
http://www.canadianquilter.com/events-calendar.php

Happy Quilting!


Friday, July 6, 2012

Prince Edward County Quilt Show 2012

Saturday July 7th and Sunday July 8th 2012, I'll be the guest artist at the Prince Edward County Quilt Show, held at the Wellington Community Centre - Essroc Arena.

The show will be open 10-5 both days and parking is free!


Come see all the beautiful quilts that will be on display and check out the vendors!

It'll be a great show!

Monday, June 25, 2012

Chenille, Chenille, Chenille

I'm so excited to share with everyone a technique that I've recently fallen in love with.

This is my new best friend:

So far I have used it to make pot holders & casserole dish pads, pillows and wall hangings. 

 The photo below is a close up photo of this casserole pad, so that you can see the effect of the chenille cutter once the fabric has been washed.


 This wall hanging has not yet been washed, but it gives you an idea of what it will look like once you have sewn and cut across the entire panel.
So how do you chenille exactly?
First you need to decide if you are going to chenille a panel (as seen in the casserole pads and wall hanging) OR you can chenille a regular piece of a cotton with a light print, as seen in the photo of the pillow.

TIP: if you are going to chenille a fabric that is NOT a panel, do not choose something with a large scale print. I have already attempted it and even though I "fussy cut" so that I got the same "repeats" within the fabric, it did not turn out. Once washed, you could no longer really tell what the print was. So in the pillow above, I chose a pink with tiny white polka dots, which can still be seen when looking at the pillow up close. Select a fabric that has a small print, something that you will be able to notice the print on the fabric once cut and washed. 

For casserole pads & wall hangings (or crib quilts):
Place the backing fabric right side DOWN on the table
Place your batting on top (for casserole pads use the fire resistant batting and make sure that the silver/shiny side is face UP)
Place your "base" fabric on top of your batting, right side up. (your base fabric should be a solid/neutral fabric that matches your panels, you will only see a tiny bit of the base fabric when you are done, but you don't want the base to be too dark or it will over take your main fabrics)
On top of your base fabric place THREE layers of your main fabrics (whether it is three identical panels or three pieces of cut fabric)
Pin or baste all these layers together

Stitch across your panel on a 45 degree angle, each row of stitching should be 1/4" apart (you can use the edge of your pressure foot as a guide)

Once you have sewn across your entire item, use your chenille cutter and slice ONLY the top three layers, inbetween each row of stitching. DO NOT CUT THE BASE FABRIC. 

Once you are done cutting, you can bind the edges as desired and wash your item. 
I recommend washing in cold water. 

Practice and play using different types of panels/fabrics and make different things. This works with both cotton and flannel. 

Have fun! :) 

Tuesday, June 12, 2012

Quilts Kingston 2012


This past weekend I was working for V.B Simkins Sewing Machines at the Quilts Kingston 2012 quilt show, hosted by Kingston Heirloom Quilters and the Limestone Quilter's Guild.

It was absolutely a fantastic weekend, I saw some stunning quilts on display in their quilt competition, met some new quilting friends, demonstrated lots of sewing machines and new techniques and of course ran into some old friends.

I thought I'd share a picture of Eric's truck, current owner of V.B Simkins Sewing Machines, downtown Kingston. I wish I could have a truck like this too!

At the show I purchased a Janome 7700 Horizon sewing machine...I haven't taken it out of the box yet, but I definitely will tomorrow. I'm so excited to make something with it!


Monday, June 4, 2012

4 More Sleeps!

Only four more sleeps until the Kingston Quilt Show. I'll be there at "VB Simkins Sewing Machines" booth. I'm very excited for the show!
http://quiltskingston.org/2012%20Quilts/QuiltsKingstonPoster2012.pdf


I have pictures of some completed projects my students completed this past Saturday in class:
This is her second paper pieced ice cream quilt. One was previously done as a gift for a baby cousin and this one is "FINALLY!" for her :)


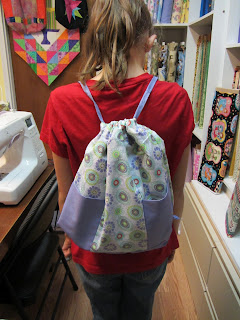
This is Jenna and her drawstring backpack. She's been hard at work doing projects that she has been giving away as gifts to others, nice to see both these girls do something for themselves.


Awesome work girls!

My Spring session of lessons ends on Saturday June 23rd, summer camp starts Monday July 2nd! 

Monday, May 21, 2012

I hope everyone enjoyed their long weekend, I just got home from the cottage. The weather was absolutely gorgeous all weekend!

I've recently fallen in love with shirring. For those of you who have tried it before, I strongly encourage you to put this technique to the test and play with all the opportunities that it provides. For those of you who have not tried it before, I suggest you read this post, follow along with the instructions and try it! It is sew much fun!

So far I have made tops and dresses as samples to teach to the children in my sewing classes. We "shirr" from the top of the neckline to the bottom of the bust line to create an elasticated bodice.


To create this effect, you need to use elasticated thread ONLY in the bobbin. Unfortunately you cannot fill the bobbin on your sewing machine as you normally would, so you have to wind the elasticated thread onto your bobbin by hand. You may need to fill multiple bobbins before you begin, depending on the size of the area that you are shirring. Use a cotton thread on the top of your machine that matches the fabric that you wish to use. Before you begin, I would suggest you test your stitching on a scrap piece of fabric, to see if you need to make any tension adjustments.

To determine the cutting size, measure your bust and cut a piece of fabric that is approximately one and a half times your measured size. As for the length, you can determine that to your own preference. I cut my dress 27 inches long.

First, I stitched my side seam and then hemmed the top of my neckline. Then, I began to sew rows of stitches 1/4" apart using my elasticated thread. It will take about 3 or 4 rows before you notice your fabric beginning to bunch at all. The amount of rows that you stitch depends on the size of your bustline. I stitched approximately 19 rows.

When you finish sewing all your rows, turn your garment inside out and steam the elastic. This will help shrivel the elastic up and make your dress/top more fitting.

Then you can hem the bottom as desired and either leave your dress strapless or you can use coordinating fabric or ribbon to create straps as I have done.

You can also use your shirring method to create waist bands on skirts, or you can do a few rows of stitching on the bottom of a sleeve to create a puff sleeve/peasant look.

Have fun experimenting and shirring away! FUN FUN FUN!

Tuesday, May 15, 2012

Mother's Day

I hope everyone had a fantastic Mother's Day. Many of my students made oven mitts and aprons as gifts for Mother's Day this year. I had this great new fabric now known as the "mommy-print" which displays women cooking, cleaning and just doing "mommy things". Such a cute print. This is a picture of one of my adult students, who has made four pairs of oven mitts and one apron so far, all of the same print, but each time using a different lining fabric, as various gifts.


This past weekend I attended the Quilt Show put on by the Port Perry Patchers Quilt Guild. It was a fabulous show and I had so much fun viewing the quilts in the quilt competition. I also learned lots of new things and of course made some purchases! (woo-hoo!) Pictures to come as soon as I try them out!

Monday, April 30, 2012

SUMMER

All finished my exams! YAY! Summertime means lots and lots of reading, hanging out at the cottage and of course sewing!

I have two adults students who have each recently finished their quilts.
This one is cross-stitched alphabet blocks, done for her Grandson.


 This quilt was done by one of my other students, a photo memory quilt for her Granddaughter.


Very proud of both of their quilts! And I know they will be forever cherished by their grandchildren.


In my last post I mentioned that I purchased some elasticated thread and a jelly roll. I have been playing around with my elasticated thread and I will soon post pictures of what I've done. As for the jelly roll, it is a work in process right now but coming along beautifully. My Mom is actually the one working on it, very proud of her! Pictures to come soon!


Wednesday, April 18, 2012

Lindsay Creative Quilter's Guild


On Monday April 16th 2012, I had the wonderful opportunity to present my trunk show to the members of the Lindsay Creative Quilter's Guild. What an incredible group of women! I had such a good time and felt very welcomed by all.

A big thank you to the women of the guild for their invitation for me to attend their meeting and for their encouragement in my future endeavours. Also a big thank you to my parents for accompanying me on my trip to Lindsay, for holding up my work during my presentation and for being ever so supportive.


Looking forward to my next trunk show!

Today I bought some elasticated thread and a jelly roll...I have some ideas up my sleeve! Unfortunately I will not be able to actually try out my ideas until the end of my exams.
I will be free to play with my sewing machines on April 26th....and then the fun will begin!